Works with C1 and C2 family cameras
# OBS Studio OBS studio is an advanced open source tool to record and stream video and audio. [Can be downloaded for Windows, OSX and Linux here](https://obsproject.com) [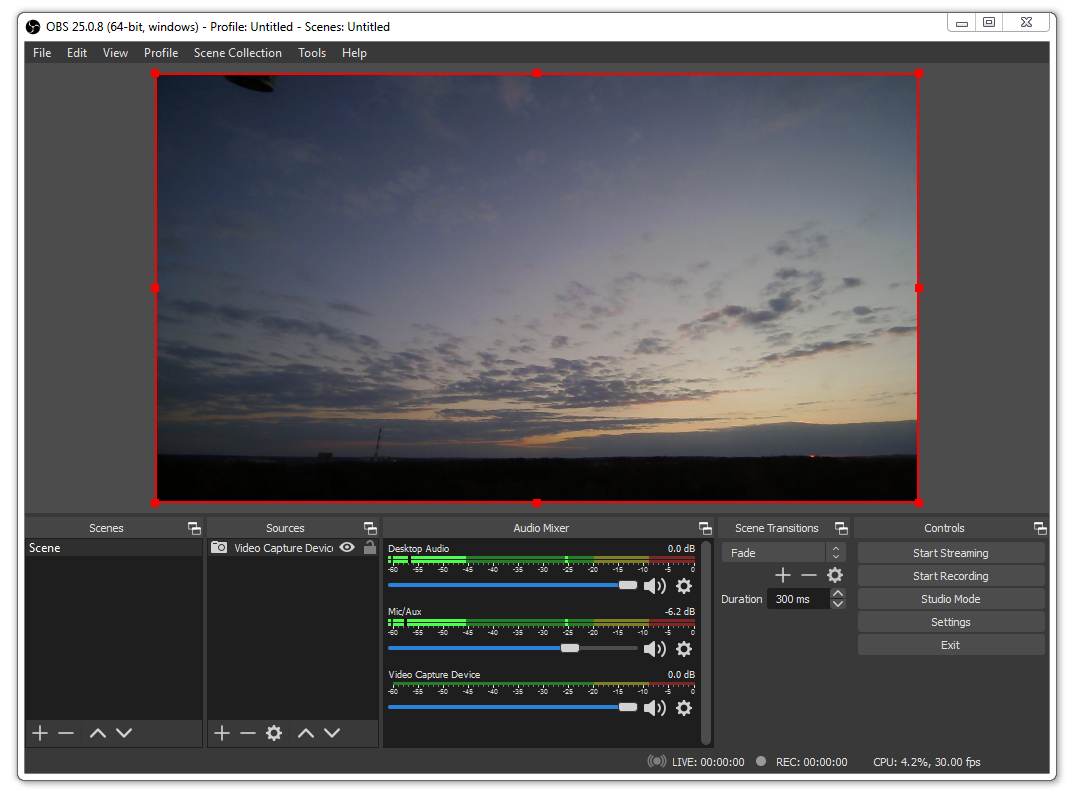](https://wiki.kurokesu.com/uploads/images/gallery/2020-07/obs.png) Configuration window can be accessed by double clicking on the video source. Camera settings window will be shown after clicking on **Configure Video** button. [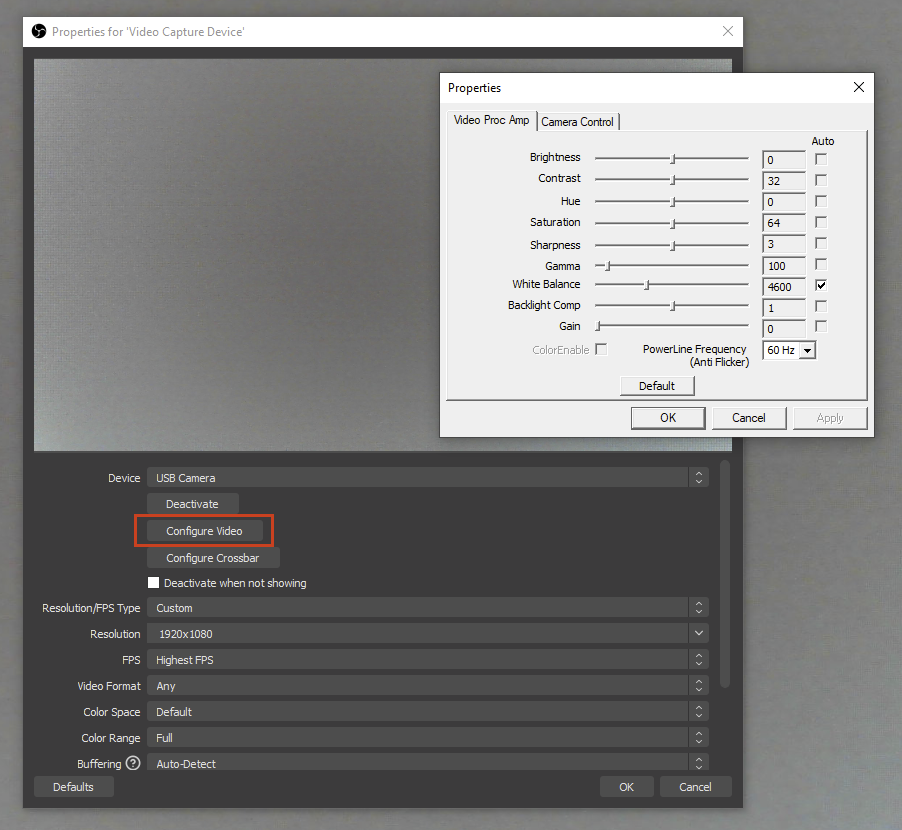](https://wiki.kurokesu.com/uploads/images/gallery/2024-06/image-1718690805924.png)# WebRTC [WebRTC](https://webrtc.org/) is a modern way to make web browser based real-time applications. And I recently found out that this awesome library supports Kurokesu C1 camera in 1080p resolution. It will take few minutes to test provided example scripts. Open [webrtc samples](https://github.com/webrtc/samples) in your browser and click “getUserMedia with resolution constraints” to get started. [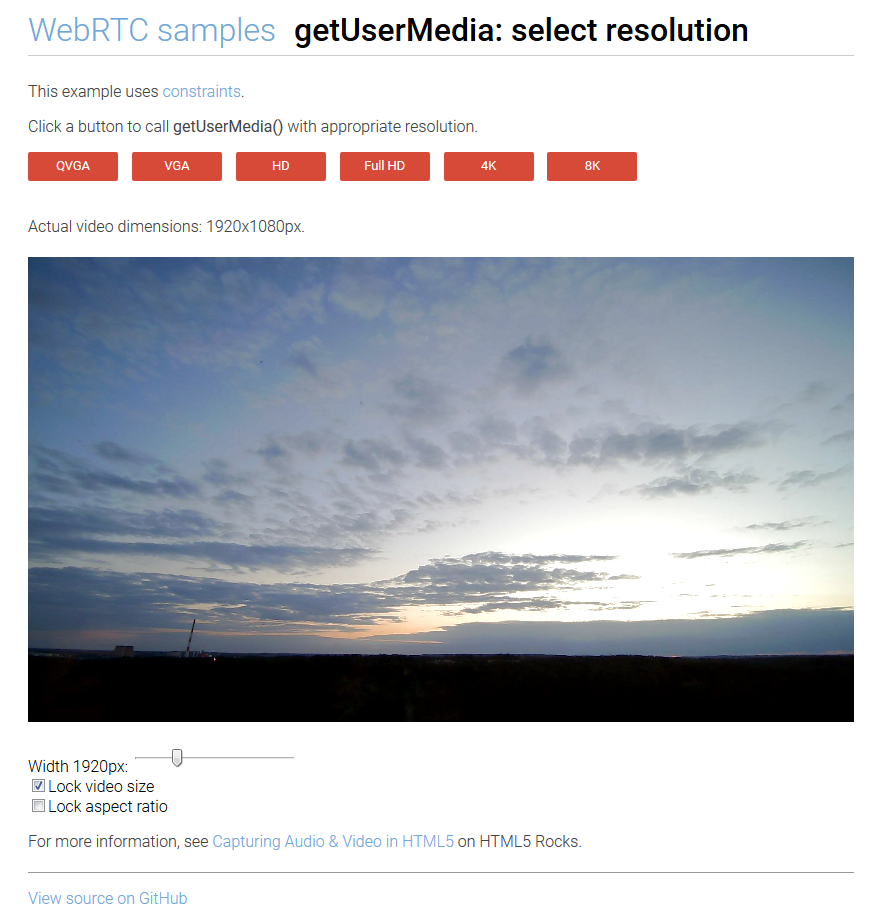](https://wiki.kurokesu.com/uploads/images/gallery/2020-07/webrtc.png)# GraphEdit GraphEdit is a little known tool distributed with Microsoft Windows Software Development Kit (SDK) and allows exploring camera settings and video rendering filters. A copy of the old version (which worked just fine without installing the whole SDK) can be found wildly on the internet. Besides the ability to tinker with options it is a much more advanced tool for viewing live view than for example VLC. There are even more advanced commercial modifications but original will be just fine. For more details check [Wiki pages](https://en.wikipedia.org/wiki/GraphEdit). A local copy of GraphEdit 9 can be found [**here**](https://www.kurokesu.com/uploads/2016-07-24_graphedit/geinst.zip). Below is a quick guide - Download, unzip and Install GraphEdit-x86.exe or GraphEdit-x64.exe (if in doubt chose GraphEdit-x86.exe) - Run graphedt.exe from the installed location - Empty program window should appear - Click on menu item **Graph / Insert Filters…** **[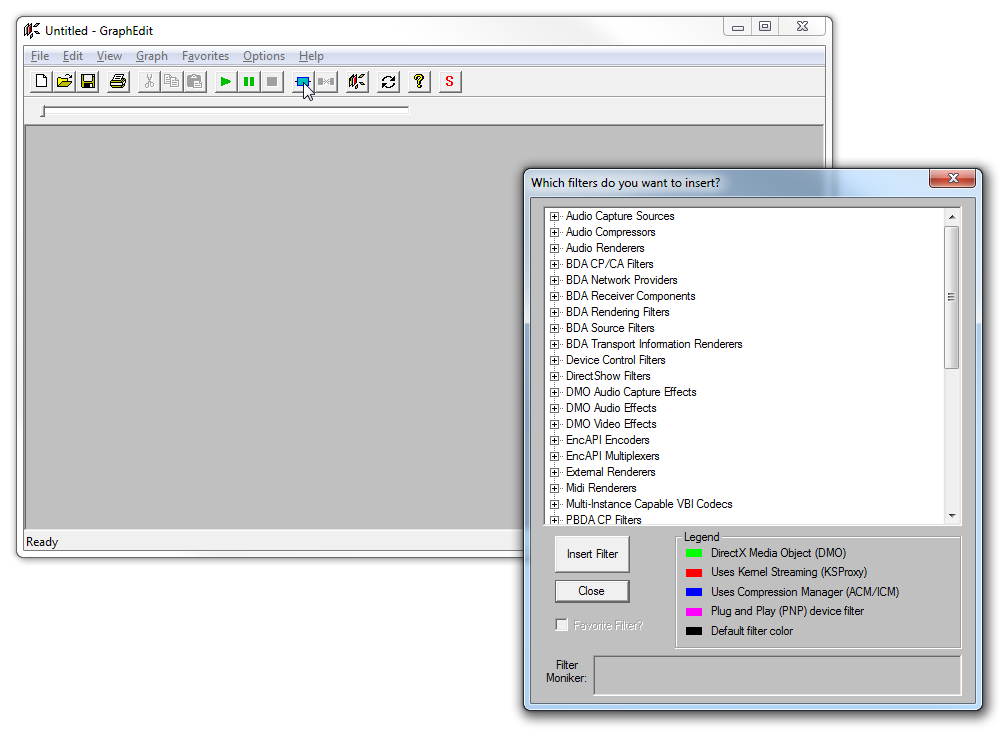](https://wiki.kurokesu.com/uploads/images/gallery/2020-08/graphview_1.png)** - Locate **Video Capture Sources** and select the needed device and press **Insert Filter** **[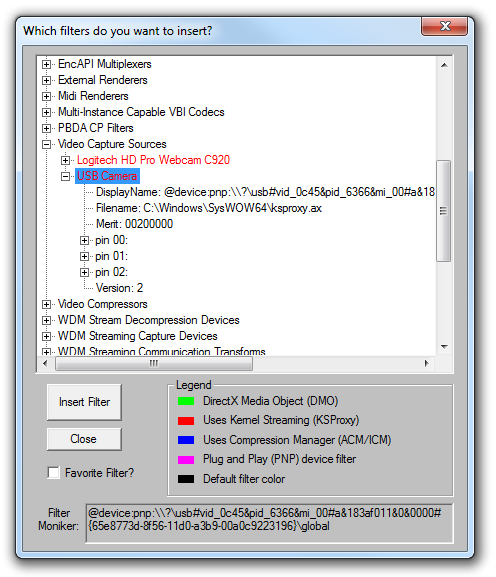](https://wiki.kurokesu.com/uploads/images/gallery/2020-08/graphview_2.png)** - Now locate a pin and click the right mouse button. [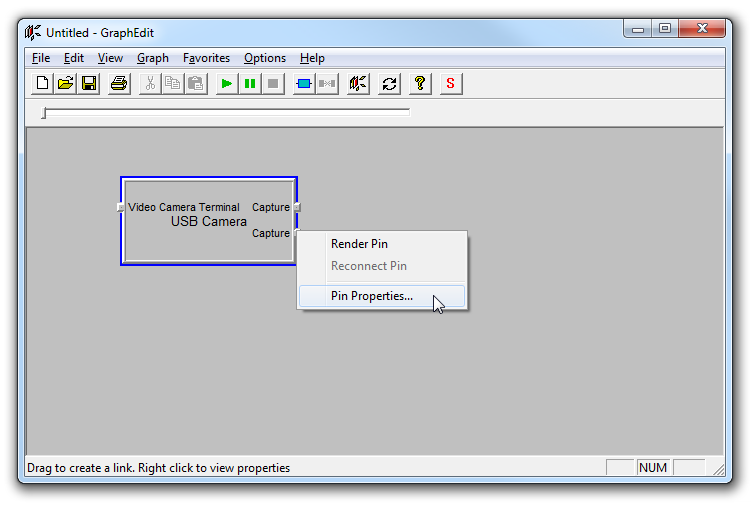](https://wiki.kurokesu.com/uploads/images/gallery/2020-08/graphview_3.png) As we further inspect all pins, we can find out that one pin has YUY2 and MJPG output options, another one is for H264. - Chose options as needed or leave intact - Right-click a pin again and click **Render Pin** **[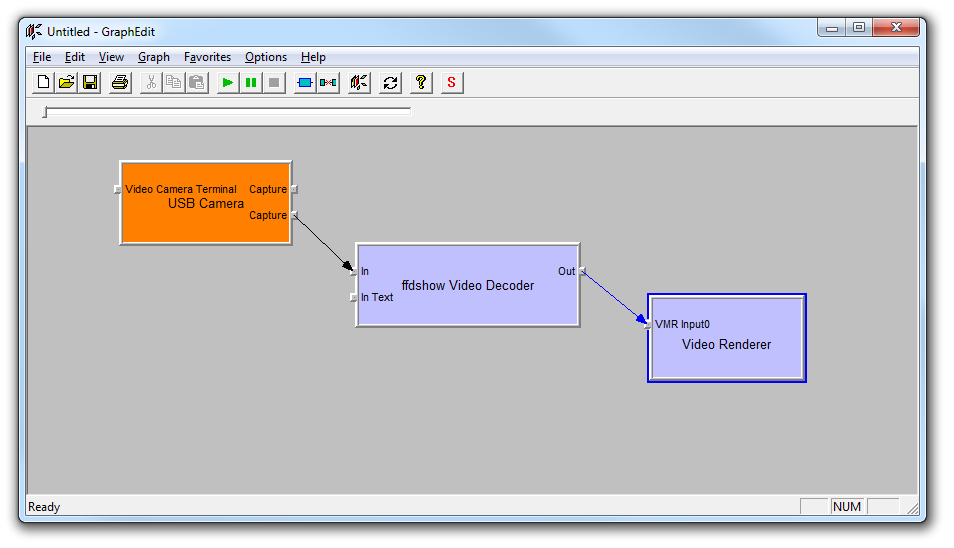](https://wiki.kurokesu.com/uploads/images/gallery/2020-08/graphview_4.png)** - Click the **Play** button or press **Space key** to play video. [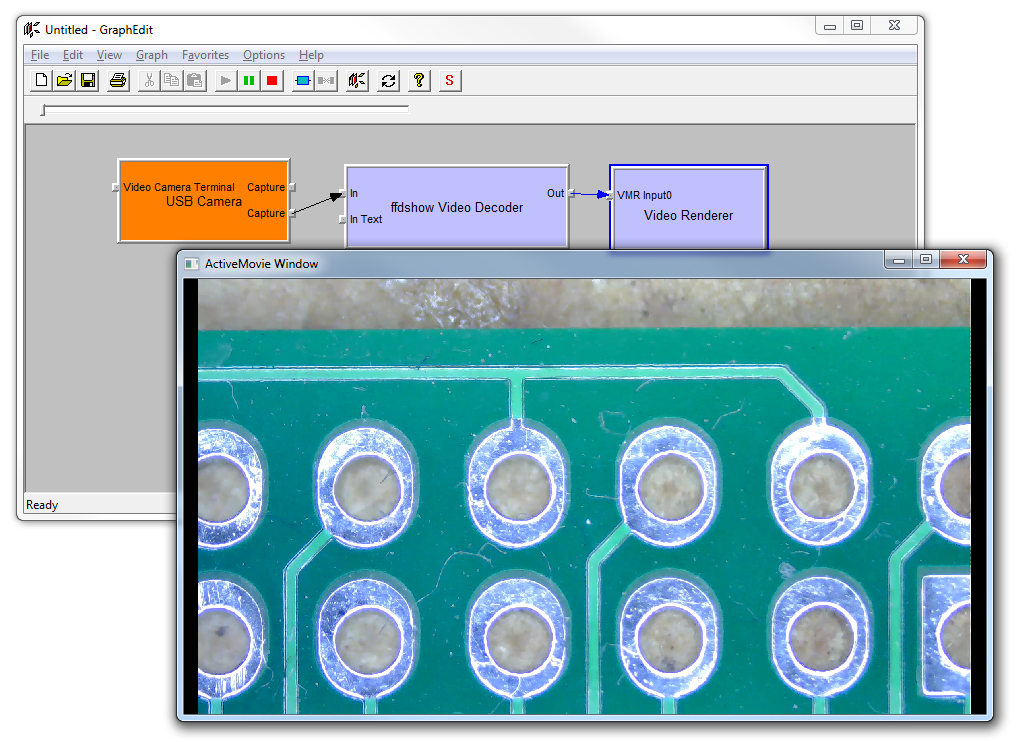](https://wiki.kurokesu.com/uploads/images/gallery/2020-08/graphview_6.png) Original blog post is [still here](https://www.kurokesu.com/main/2016/08/04/exploring-and-displaying-usb-video-with-graphedit/)# USB Camera on Android C1 family cameras are compatible with Android operating system and can be used as external camera without rooting device nor tampering with drivers. If application is coded properly it should let you select external camera somewhere in settings. #### Android application Free version of [USB Camera](https://play.google.com/store/apps/details?id=com.shenyaocn.android.usbcamera&hl=en_US&gl=US) application can be used to perform basic tasks: - Take snapshot pictures - Record video - Adjust auto/manual parameters #### Connectivity Modern tablets and mobile phones have USB-C port, so USB-C to USB-A OTG cable should be used. [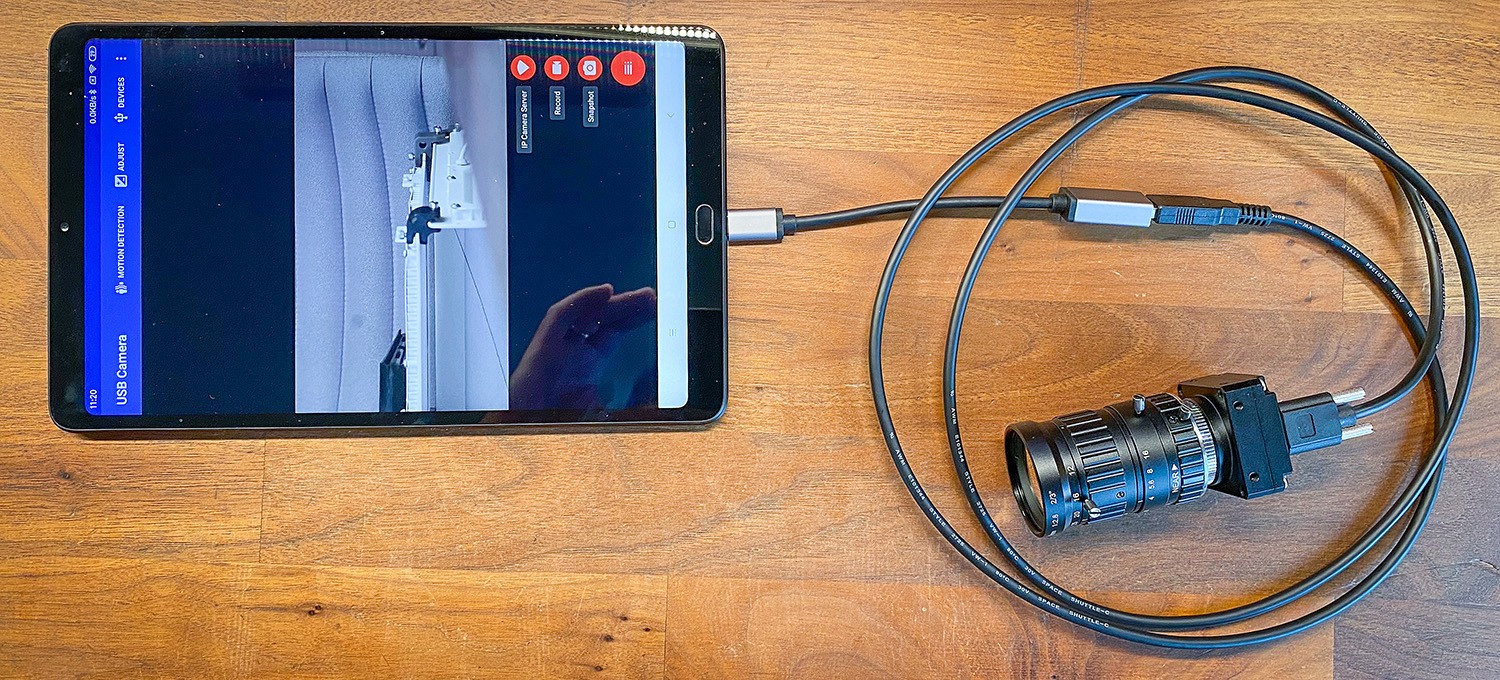](https://wiki.kurokesu.com/uploads/images/gallery/2020-12/android_camera_r.jpg) #### Examples ##### Manual adjustments window [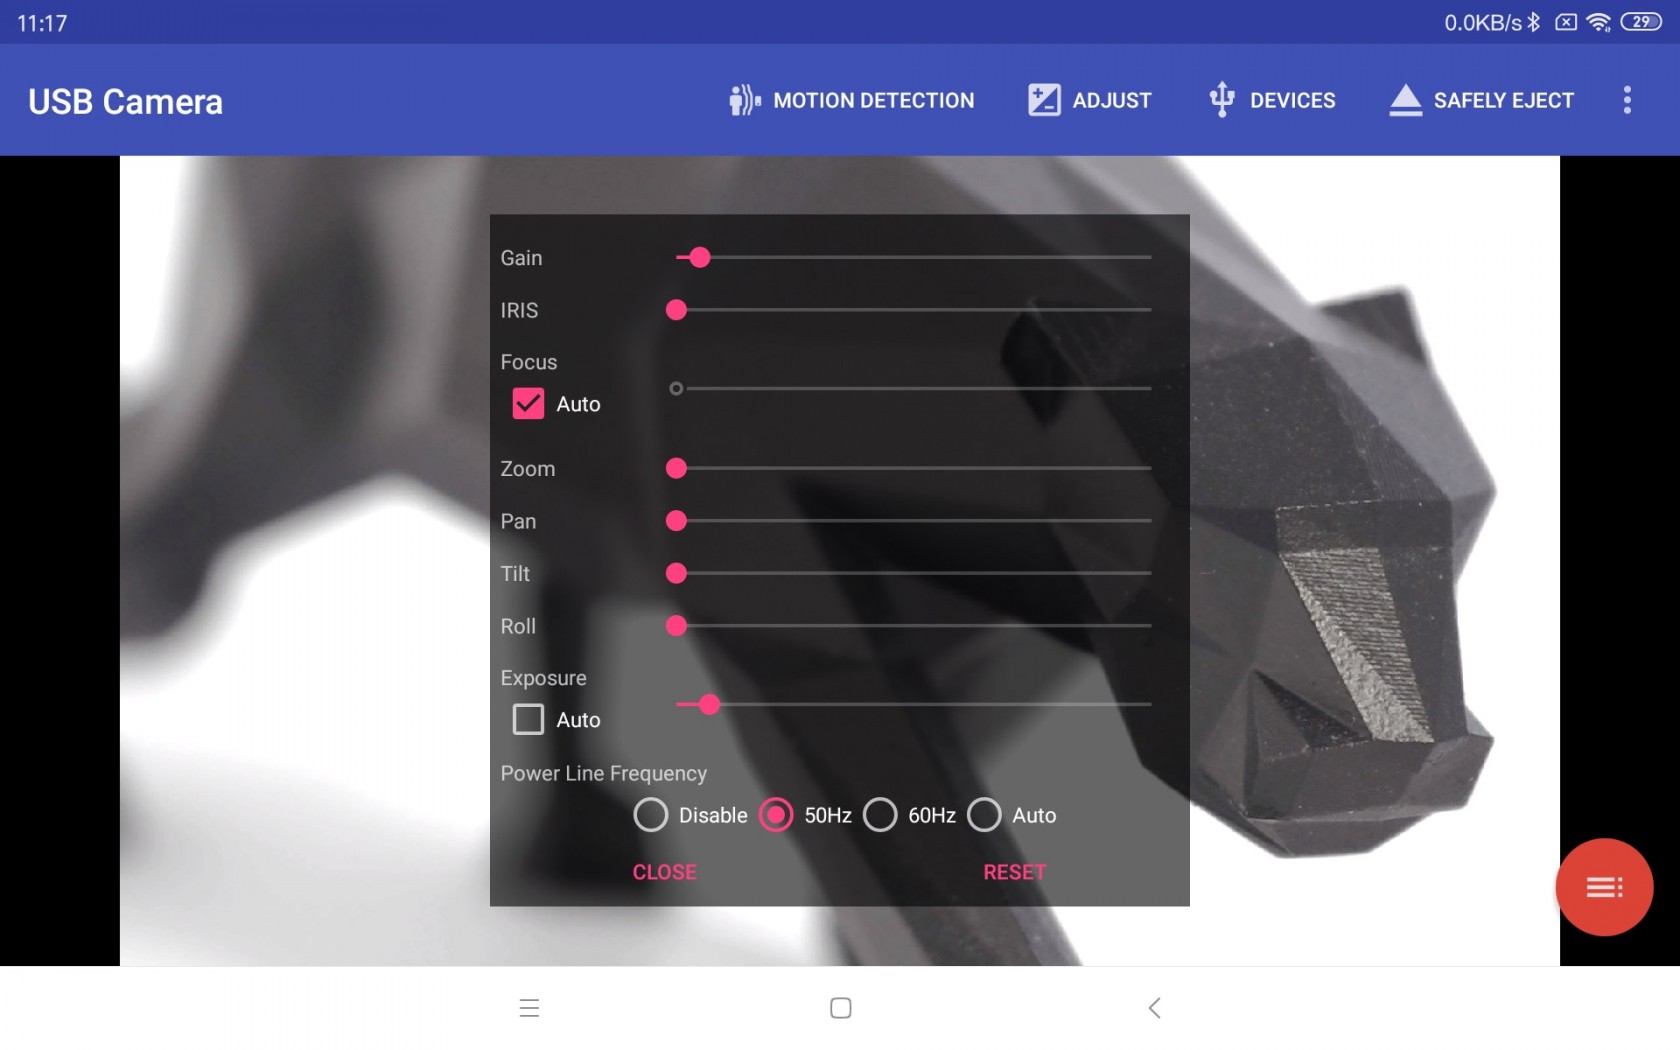](https://wiki.kurokesu.com/uploads/images/gallery/2020-12/example.jpg) ##### Full HD 1080x1920 snapshot sample [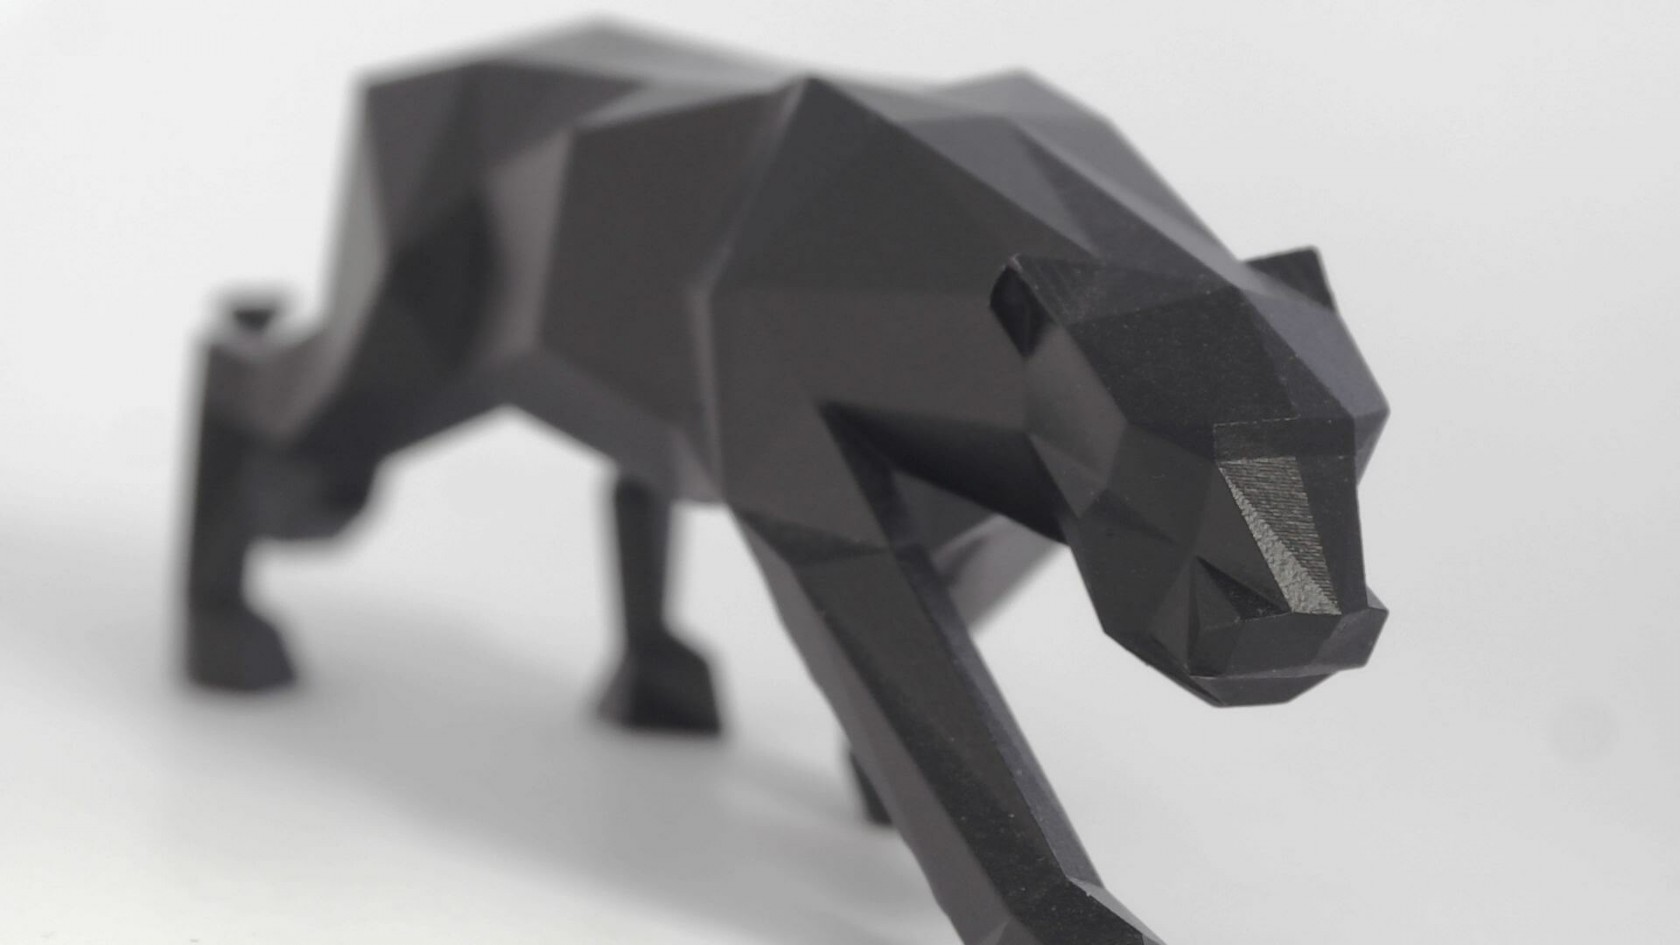](https://wiki.kurokesu.com/uploads/images/gallery/2020-12/sample.jpg)# VLC to display USB camera VLC is industry standard video player and rarely there is a computer without installed copy. Thus makes it very accessible tool to have quick camera preview. It has own drawbacks though: - Requires many clicks and some manual parameter adjustment in order to view MJPEG 1080p video - After some time video starts lagging until video freezes - In early versions there was an option to call camera properties menu, but in recent updates this option is gone Screenshots below indicates what and when to press to have camera preview Open VLC and click `Open Capture Device...` [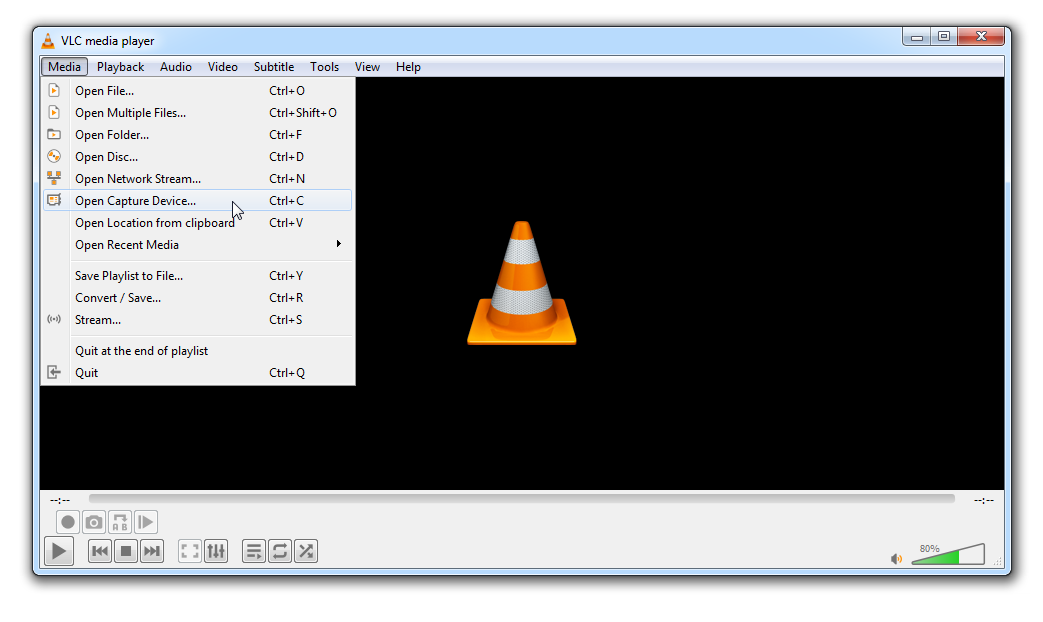](https://wiki.kurokesu.com/uploads/images/gallery/2021-03/2.png) Select desired camera [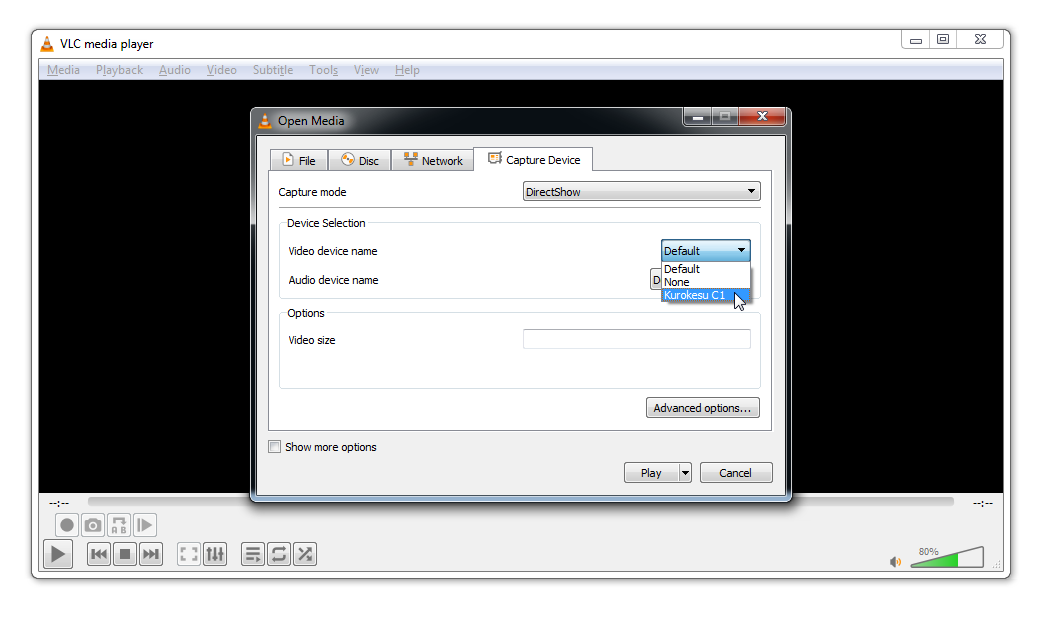](https://wiki.kurokesu.com/uploads/images/gallery/2021-03/3.png) There is one more nifty parameter hidden under `Show more options` checkbox. By default VLC uses 300ms to delay camera view. If real-time video is needed, change to 0ms. But disabling cache has bugs and some video sources will not work at all. For initial testing leave caching untouched. [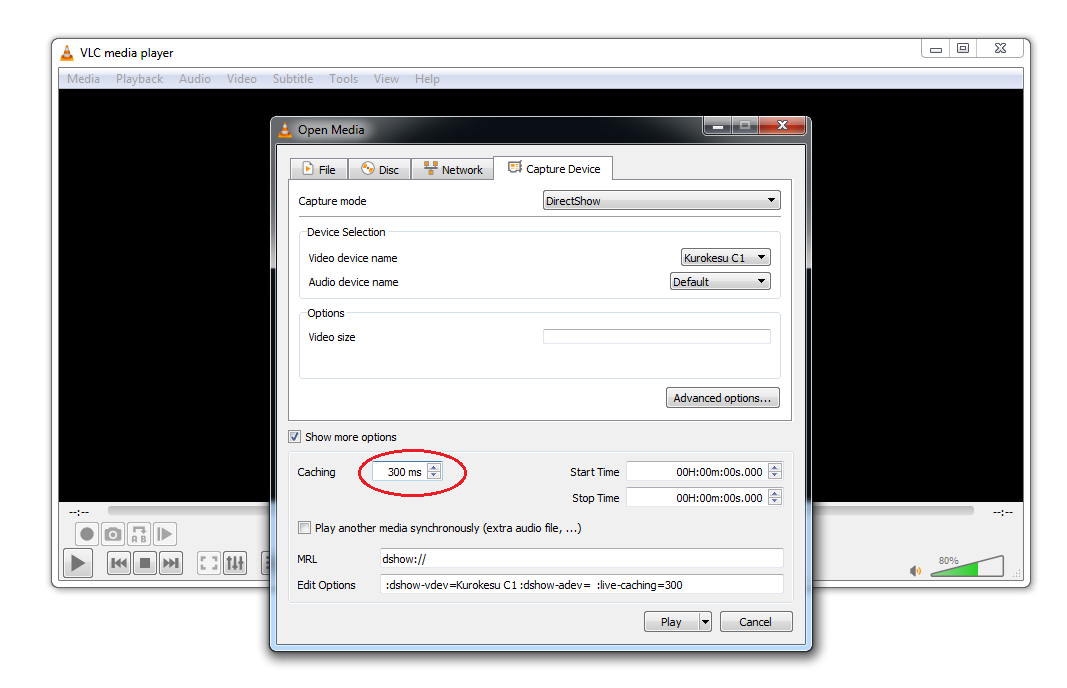](https://wiki.kurokesu.com/uploads/images/gallery/2021-03/2_.png) Now click `Advanced options...` button, in new window type **16:9** `Picture aspect ratio n:m` and check `Device properties` checkbox. [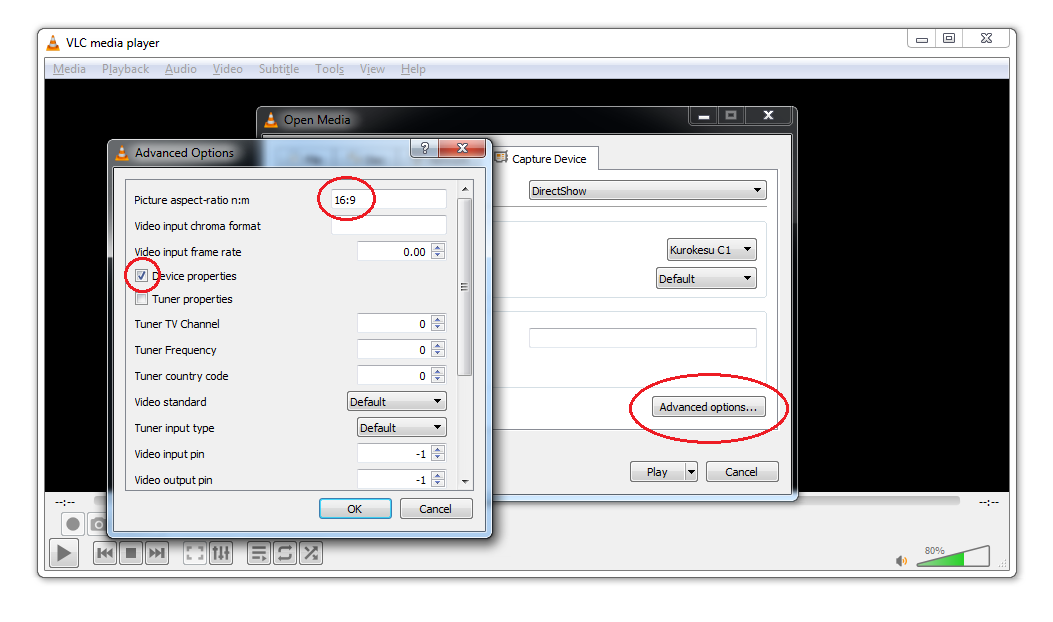](https://wiki.kurokesu.com/uploads/images/gallery/2021-03/4.png) Feel free to adjust camera properties or leave as is [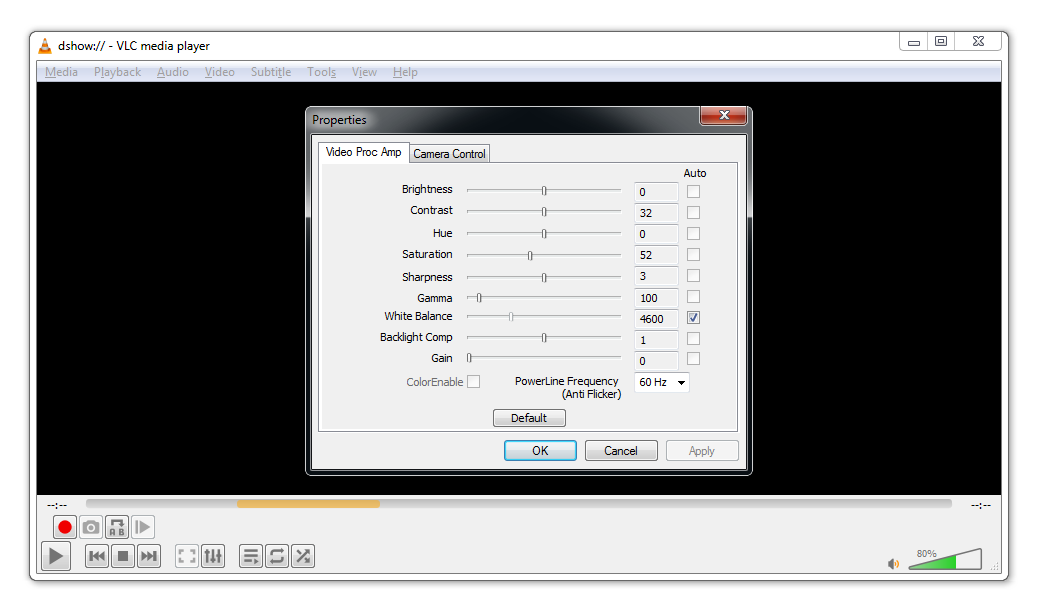](https://wiki.kurokesu.com/uploads/images/gallery/2021-03/5.png) Choose **MJPEG** compression, **30 FPS** and **1920x1080** image size. [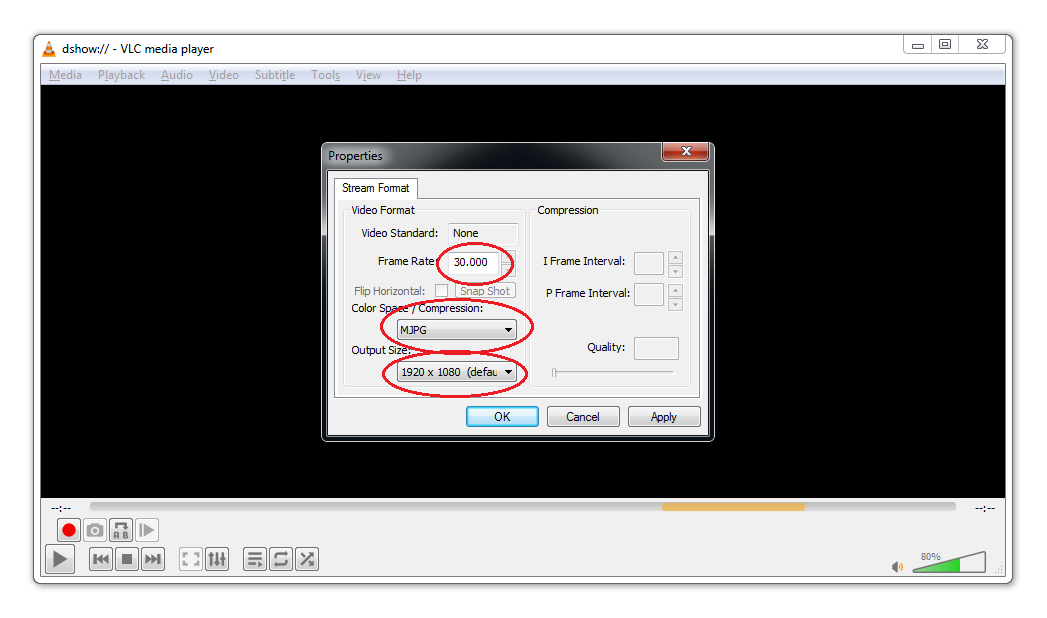](https://wiki.kurokesu.com/uploads/images/gallery/2021-03/6.png) One more window to skip [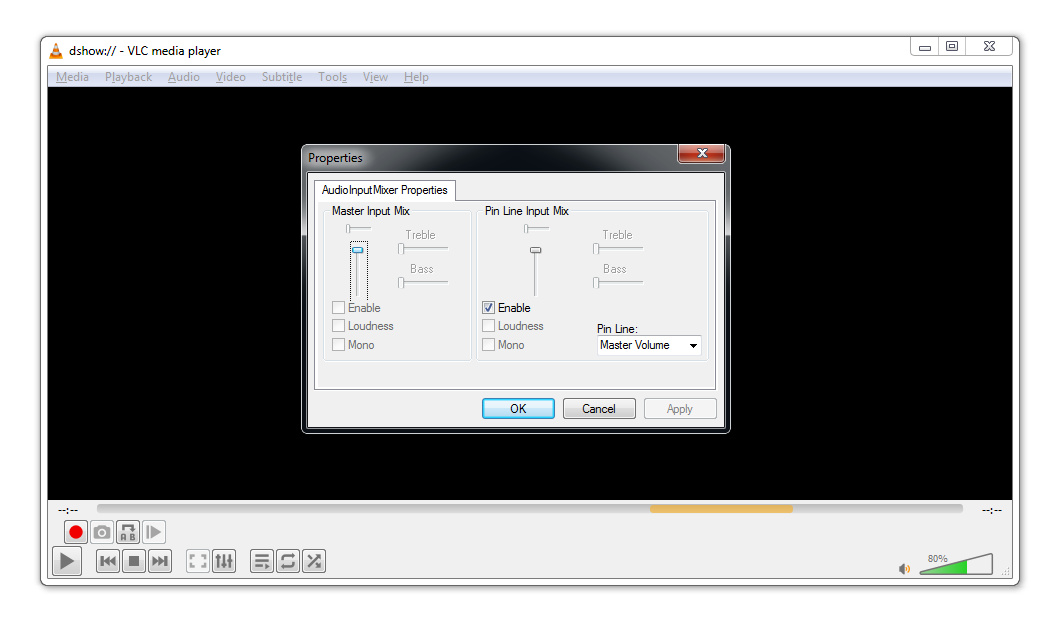](https://wiki.kurokesu.com/uploads/images/gallery/2021-03/7.png) And finally preview is live [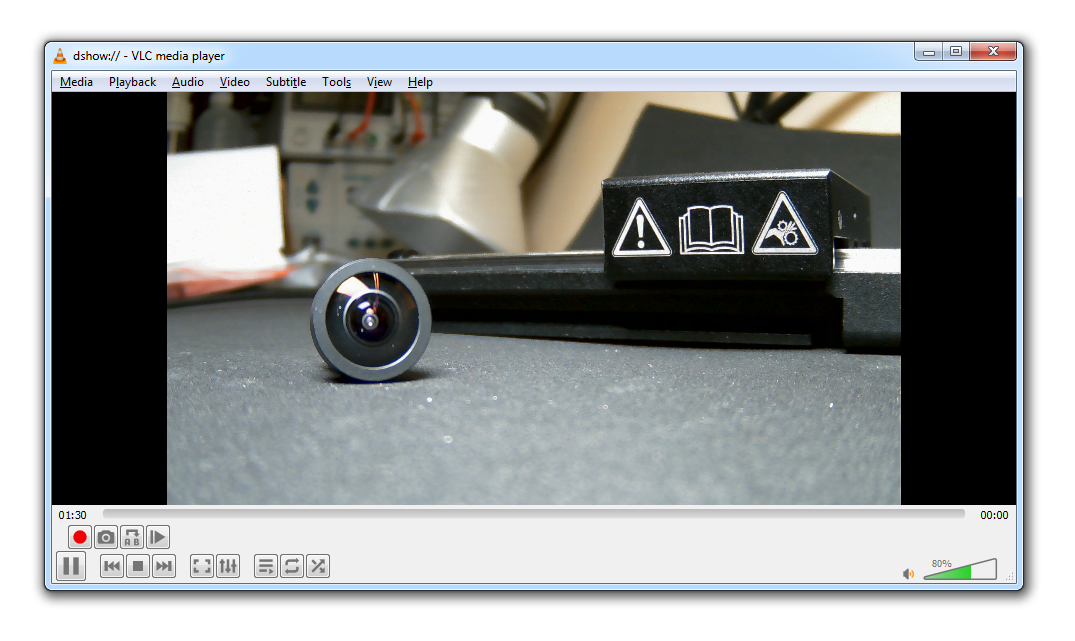](https://wiki.kurokesu.com/uploads/images/gallery/2021-03/8.png)