# GraphEdit
GraphEdit is a little known tool distributed with Microsoft Windows Software Development Kit (SDK) and allows exploring camera settings and video rendering filters. A copy of the old version (which worked just fine without installing the whole SDK) can be found wildly on the internet. Besides the ability to tinker with options it is a much more advanced tool for viewing live view than for example VLC. There are even more advanced commercial modifications but original will be just fine. For more details check [Wiki pages](https://en.wikipedia.org/wiki/GraphEdit). A local copy of GraphEdit 9 can be found [**here**](https://www.kurokesu.com/uploads/2016-07-24_graphedit/geinst.zip).
Below is a quick guide
- Download, unzip and Install GraphEdit-x86.exe or GraphEdit-x64.exe (if in doubt chose GraphEdit-x86.exe)
- Run graphedt.exe from the installed location
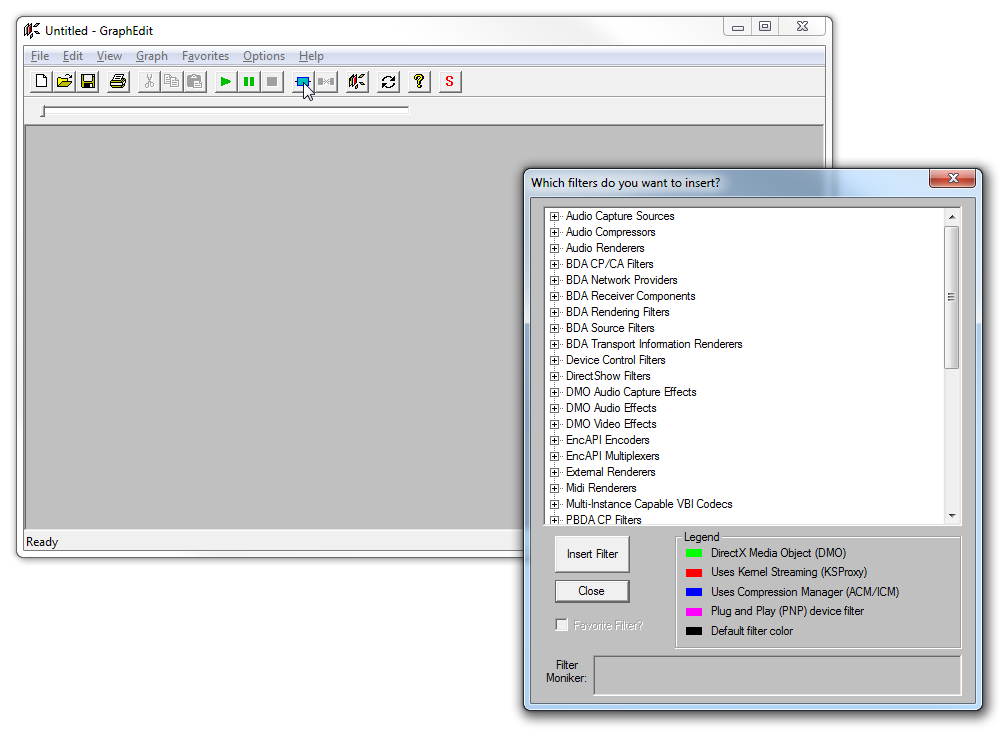
- Empty program window should appear
- Click on menu item **Graph / Insert Filters…**
**[](https://wiki.kurokesu.com/uploads/images/gallery/2020-08/graphview_1.png)**
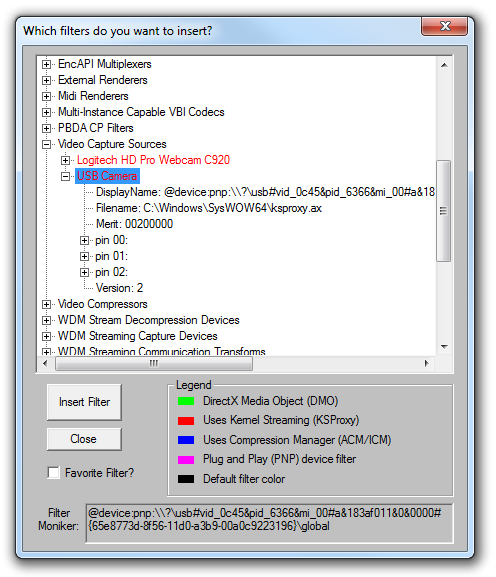
- Locate **Video Capture Sources** and select the needed device and press **Insert Filter**
**[](https://wiki.kurokesu.com/uploads/images/gallery/2020-08/graphview_2.png)**
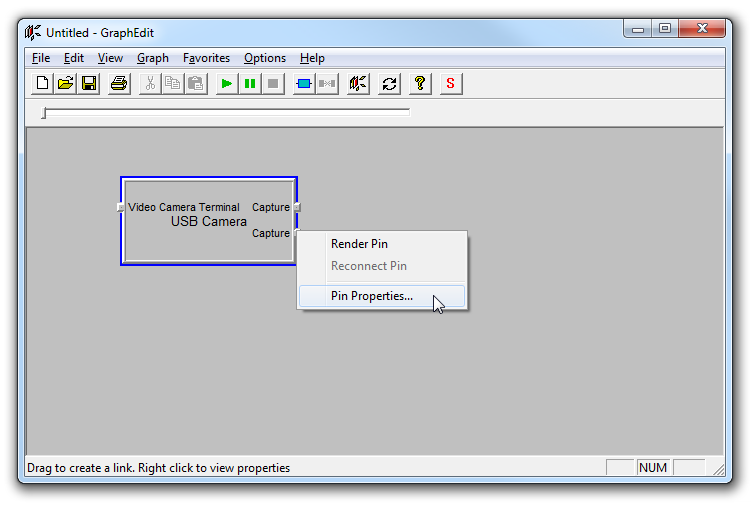
- Now locate a pin and click the right mouse button.
[](https://wiki.kurokesu.com/uploads/images/gallery/2020-08/graphview_3.png)
As we further inspect all pins, we can find out that one pin has YUY2 and MJPG output options, another one is for H264.
- Chose options as needed or leave intact
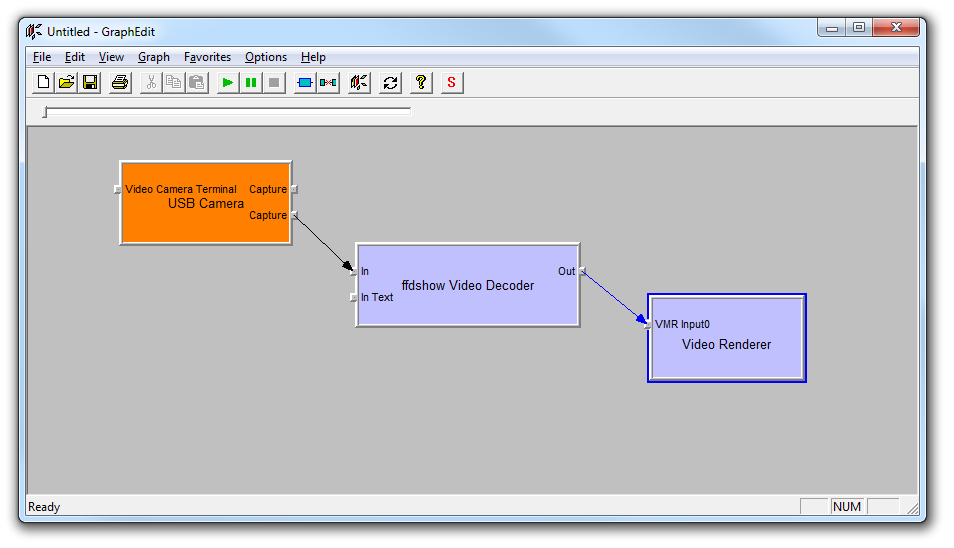
- Right-click a pin again and click **Render Pin**
**[](https://wiki.kurokesu.com/uploads/images/gallery/2020-08/graphview_4.png)**
- Click the **Play** button or press **Space key** to play video.
[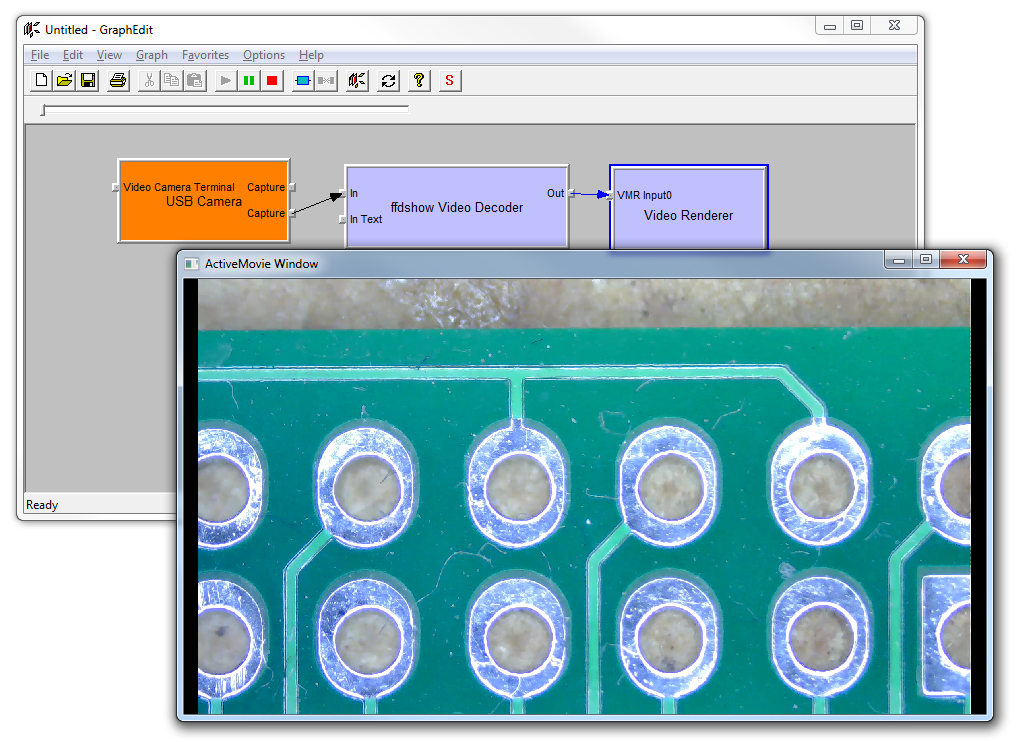](https://wiki.kurokesu.com/uploads/images/gallery/2020-08/graphview_6.png)
Original blog post is [still here](https://www.kurokesu.com/main/2016/08/04/exploring-and-displaying-usb-video-with-graphedit/)