Demo
Connectivity
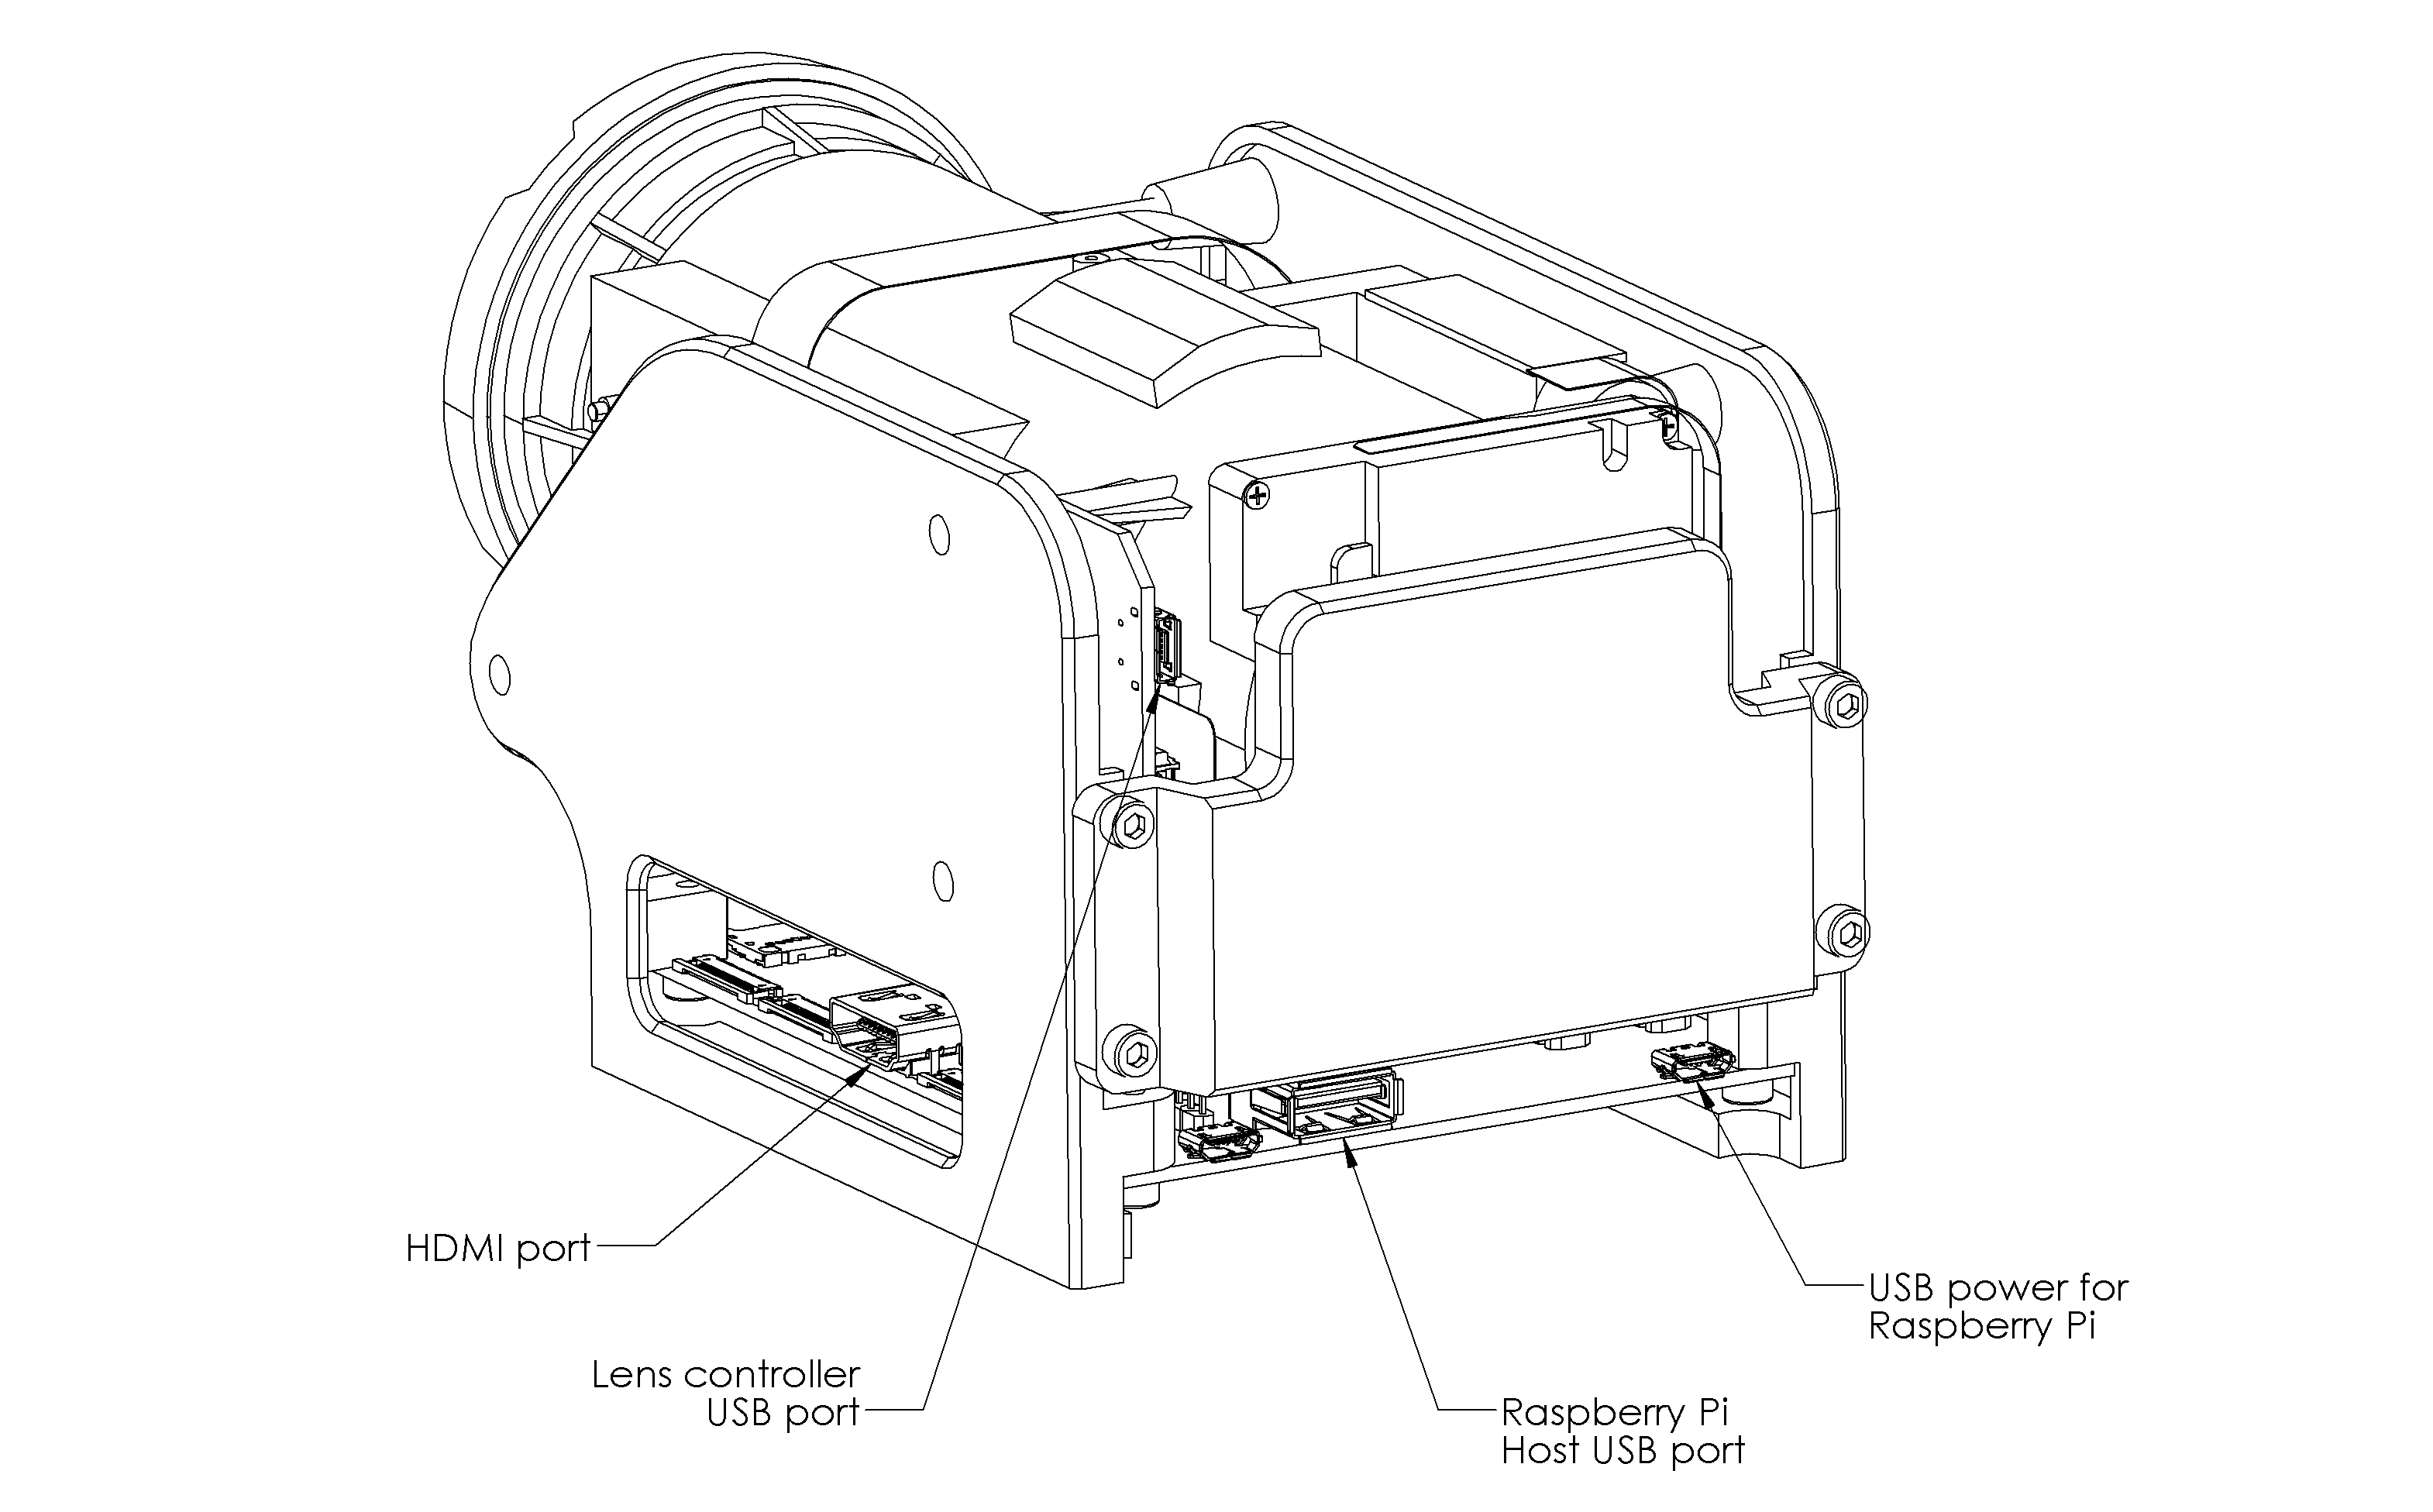
Connect cables between the lens kit and a computer:
- USB-micro cable #1 - Raspberry Pi power (optionally can be connected to the included wall charger)
- USB-micro cable #2 - lens controller
- HDMI - live camera view
Software
Software is maintained on GitHub. Check the releases section https://github.com/Kurokesu/SCE2-SDK/releases for latest the compiled version.
Workflow
- Connect all the cables (HDMI and both USB) to a computer.
- After Raspberry Pi boots, it will start displaying a live picture from the camera
- Download, unzip and start demo software
L084_SCE2_tester.exe - Select com port and press connect, the lens should be identified, and controls enabled
- Click
Seek reffor each axis (if the button is not enabled, try moving the axis manually, this is a temporary issue that will be fixed in future releases) - Click each preset
Gobutton to move the lens to the a different zoom/focus position. - Move each axis manually
<and>buttons to change focus and zoom.


